How to Fix a Robot Vacuum Map After Moving Furniture
How to Fix a Robot Vacuum Map When Furniture Moves
You move a sofa for guests, slide a dining table, or place a playpen near the hallway. On the next run, the robot may hesitate at a doorway, label a room incorrectly, or treat part of the living area as new space.
Furniture changes can alter the landmarks a robot uses to recognize a room. A dock that shifts even slightly can also make the layout appear unfamiliar. Start with the least disruptive checks: restore reference points, inspect sensors, save the map, edit what you can, and rebuild only if necessary.
Why Furniture Changes Can Confuse a Map
Depending on the model, a robot builds its layout from walls, openings, furniture edges, sensor readings, and the dock position. When a large object moves, it may see a different path through the same room. A removed chair or new cabinet can also create an apparent boundary.
Small changes usually affect one route. Larger changes can affect room labels or make a familiar area look like an unexplored section. The effect is more noticeable when furniture blocks the robot’s usual route to a doorway, when a reflective surface changes a sensor reading, or when several objects move at once.
The dock matters even more. If it is moved, rotated, or placed in a different corner, the robot may compare the current surroundings with an old map from the wrong starting reference. A map that seems to fail immediately after a relocation should be treated as a positioning problem before it is treated as a mapping problem.
Check the Dock, Robot, and Sensors
Start with the physical setup without changing the saved map. Keep the dock approach clear and level, and remove cables or objects that could force an unusual approach.
Restore the Dock Position
Place the robot on the dock and allow it to identify the charging position. If the app shows the robot in the wrong location, return it to the dock and allow it to relocate before starting another cleaning run. This may resolve a mismatch between the robot’s current position and the saved map.
Check Sensors, Wheels, and Obstacles
Inspect the sensors and wheels. Dust on navigation sensors, hair around a wheel, or debris near the bumper can change how the robot reads walls and obstacles. Use the care instructions for the specific model. Do not spray cleaner into openings, and do not use a wet cloth where the manual calls for a dry one.
Check the changed arrangement as a route. A low stool, narrow gap, mirror, dark surface, or temporary barrier may cause repeated turns. Remove new obstacles for one supervised run, without changing the saved map.
Run a Short Supervised Test
A positioning error often appears suddenly: the floor plan looks familiar, but the robot icon starts in the wrong room, faces the wrong direction, or follows an unusual route. Return it to the usual starting point, clear the dock area, and supervise a short run. If nearby rooms are recognized, the map may still be usable. Missing rooms, overlapping boundaries, duplicated spaces, or repeated route errors across several runs point to a map problem. Check more than one room before deciding.
Save and Edit the Existing Map
Save the current layout before making edits, then address room labels and boundaries separately.
Before changing anything in the app, save or back up the current map if the software provides that option. A saved copy gives you a way to return to the earlier layout if an edit makes the result worse. Do not delete every floor or room just because one boundary looks misplaced.
Fix Labels and Boundaries
Open the map and identify the type of error. A room may have the wrong name, two spaces may appear as one, or a boundary may have shifted after furniture moved. These are different problems and may need different controls.
Room labels are often easiest to correct. If the shape is right but the name is wrong, rename it without changing the boundary. If spaces are joined, use merge or split controls. When splitting is available, place the boundary at a real opening or transition, not across a route the robot needs.
Add Stable Furniture References
Furniture markers can help with organization, but they are not a substitute for a clear route. Mark a large table, bed, or cabinet only when the app supports that object type and the marker reflects a stable arrangement. A temporary box that will move tomorrow should not become a permanent navigation reference.
Menu names differ across manufacturers, models, firmware releases, and regions. One app may call a control “Edit Map,” while another may place similar actions under room management or map settings. If a control is missing, update the app only after checking that the model and software version support the function. Do not assume that an option shown in a support article exists on every robot.
When to Rebuild the Map
Rebuilding is reasonable when the map no longer represents the home. Signs include merged rooms, a missing floor, repeated label failures after checking the dock and sensors, or routes that remain wrong despite a clear floor plan.
Prepare the Home and Watch the Mapping Run
Prepare the home for the layout you want to keep: open included doors, remove temporary obstacles, lift loose cables, place furniture normally, and keep the dock in its permanent position. Mapping with doors closed may create an accurate but incomplete map.
If the robot loses its route during mapping, note where it happened. A repeated failure at one threshold or narrow opening points toward a physical access issue. A failure that appears throughout the home points more toward dock placement, sensor condition, lighting or reflective surfaces, or a software mismatch.
Record What May Need to Be Recreated
Before replacing the map, record room names, boundaries, no-go zones, schedules, cleaning modes, and floor-specific instructions. Screenshots provide a rebuilding reference but cannot restore a deleted map. Also check whether scheduled routines depend on room names.
Do not assume that a new map will preserve every old setting. Room names, no-go zones, schedules, furniture markers, and cleaning preferences may need to be recreated. The cost of rebuilding is not only the time of one mapping run. It can also include restoring the details that made the old map convenient.
Multi-Floor Homes and Room Labels
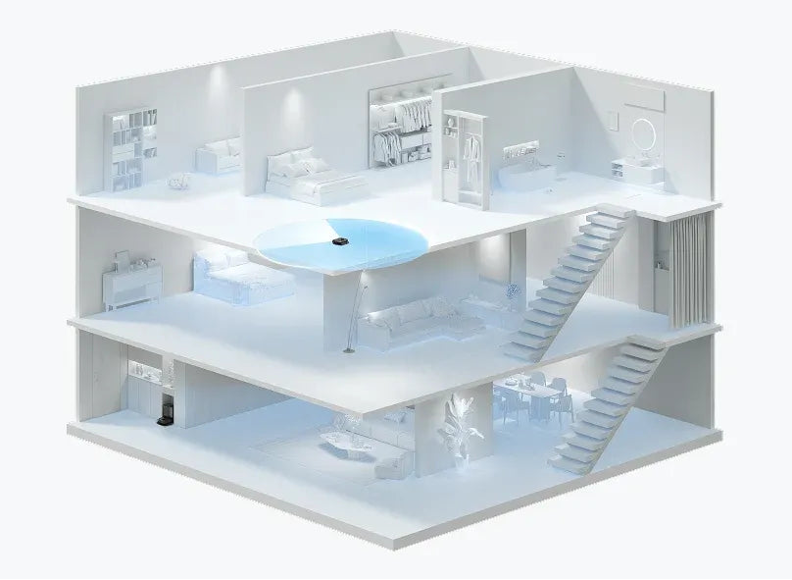
Multi-floor mapping adds another way for a correct map to look wrong. The robot may be standing on one level while the app is displaying another. Before editing a room, confirm the selected floor and check whether the app has selected the correct saved map for that floor.
Carry the robot only in the way the manufacturer allows. Some systems can recognize a stored floor without a dock on that level, while others expect a particular starting condition. A robot that starts in the wrong room may create a partial map or attach the cleaning run to the wrong floor.
Test each floor separately before resuming a full schedule. Select the correct saved map, place the robot as recommended, and supervise a small-area run. Confirm that it starts in the right room, crosses the expected doorway, and stops appropriately. Repeat on other floors. If the wrong floor is selected, stop and correct the map association before editing.
Room labels also depend on how the map was created. An open-plan kitchen and living area may be represented as one space even when a person thinks of it as two. If the app supports manual splits, use a meaningful cleaning boundary, such as a change in flooring or a consistent passage. Avoid editing a boundary simply to make the visual map match the furniture arrangement of one afternoon.
Choosing a Robot With More Map Controls
If furniture changes are common, prioritize saved maps, room naming, merge and split controls, no-go zones, and furniture or floor-type markers. Confirm that these controls apply to the exact model, not just another model in the series.
Choose controls that match the home: multi-floor mapping for homes with several levels, no-go zones for loose cables or pet bowls, and app controls that adjust areas without deleting a usable map. Availability varies by model, firmware, region, and app version, so verify the current instructions.
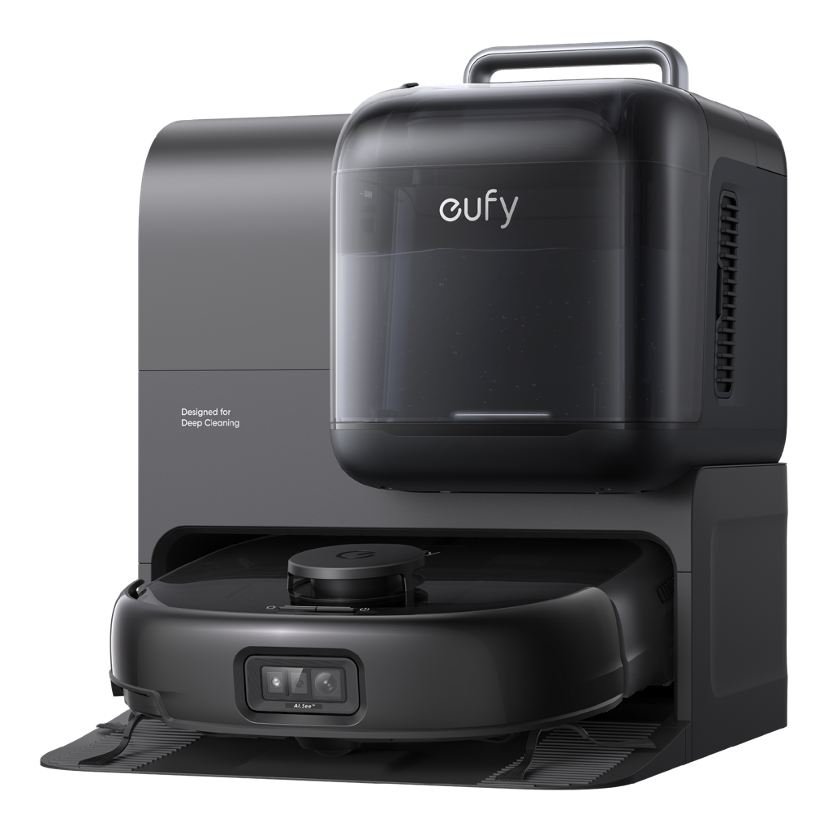
The eufy Robot Vacuum Omni E28 provides several safeguards that can make cleaning easier after a room layout changes. It supports Multi-Floor Mapping, customizable No-Go Zones, and app-based controls for managing different floors and temporary trouble spots. Its AI.See™ obstacle-avoidance system uses visual recognition to identify objects and navigate around them, while Vacuum Only and Carpet Avoidance modes provide options for different floor surfaces. Dark carpets may not always be detected, so a No-Go Zone may still be useful where needed.
For larger homes, Auto-return Cleaning can help maintain cleaning continuity by allowing the robot to return to its station during a cleaning task. These features can reduce navigation problems after furniture moves, but they do not automatically repair an inaccurate map or replace model-specific map editing. If room boundaries or routes remain seriously wrong, the existing map may still need to be edited or rebuilt. Features and menu options can vary by model, firmware, region, and app version.
If the map is mostly usable, editing preserves completed work. If it is fundamentally wrong, a fresh run may be cleaner. Physical placement and sensor condition come first.
Conclusion
Moving furniture can make a robot vacuum map look unreliable without destroying the underlying layout. Return the dock to its normal position, inspect the robot and sensors, remove temporary obstacles, and supervise a short run. Save the map before editing, confirm the correct floor, and rebuild only when rooms or routes remain seriously wrong.
For homes that change often, features such as multi-floor mapping, app-based controls, and customizable no-go zones can reduce recovery work. The eufy robot vacuums with mapping collection offers another way to compare models, but the exact controls should always be checked against the selected model and current app version.