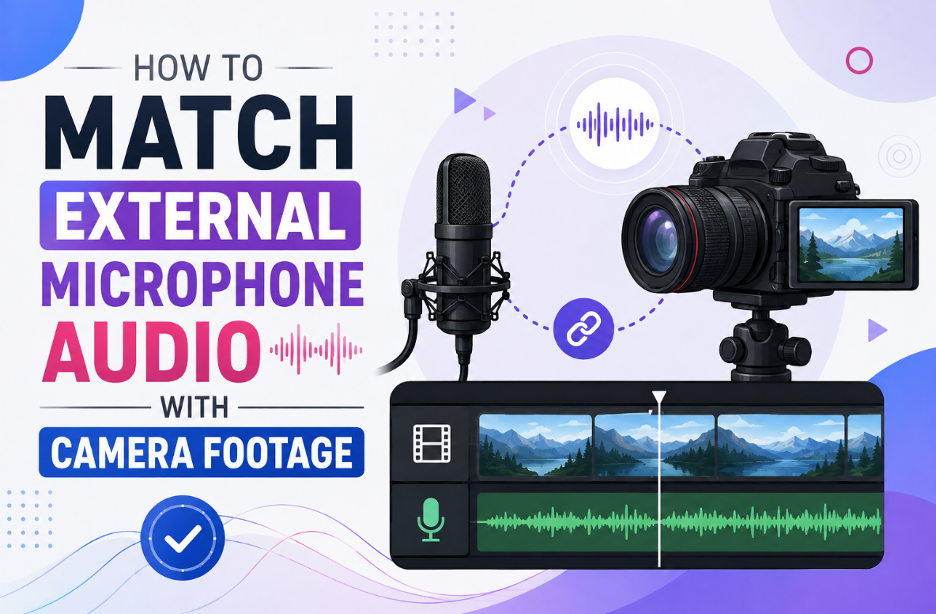
How to Match External Microphone Audio with Camera Footage
A separate microphone records the speaker’s voice while the camera handles the footage. Keeping the mic close also captures cleaner sound, making that recording better suited for the final video. The two files, however, may start at slightly different times. Learning to match audio to video is partly an editing skill and partly a recording habit. This guide covers both, using Filmora video editor on desktop for the editing process.
Part 1. Why the Camera Track Should Still Record Sound
It may seem unnecessary to leave the camera microphone on when its audio will not appear in the final video. However, that recording provides the reference needed to synchronize sound with video accurately.
The camera audio does not need to sound good. Even if it is echoey or filled with room noise, it still captures the same words, pauses, and sound peaks as the cleaner microphone recording. Editing software can use those shared patterns to line up both tracks.
Without this reference audio, the camera file is essentially silent footage, while the separate microphone recording has no clear point for automatic alignment.
Part 2. Capture a Shared Cue on Both Devices
Ordinary dialogue is usually enough to match audio to video, though a deliberate cue makes it faster and far more reliable. These 4 habits give both recordings something unmistakable to work with:
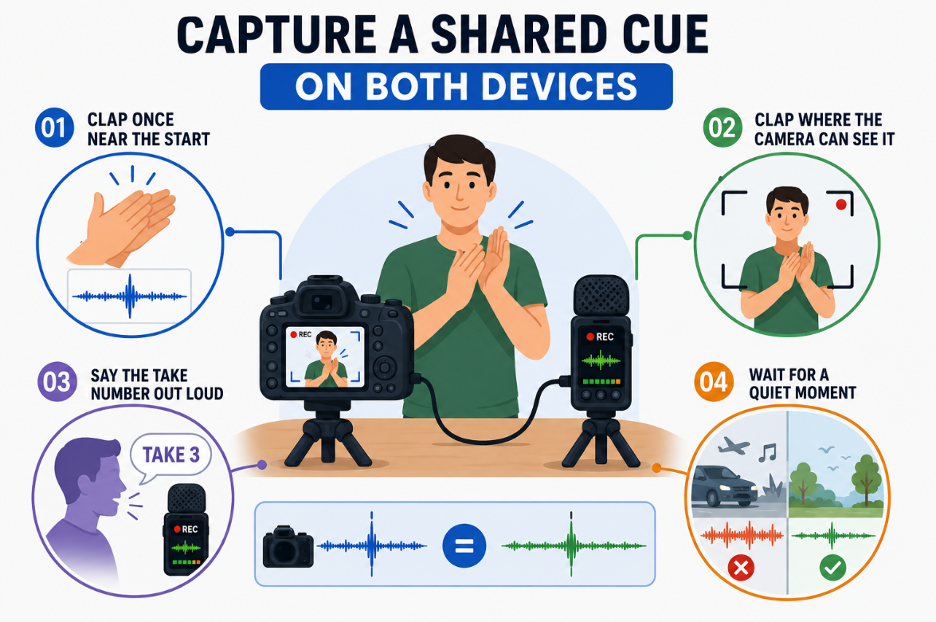
- Clap Once Near the Start: A single sharp clap creates a narrow waveform peak that is easy to identify in both recordings.
- Clap Where the Camera Can See It: A visible clap lets you compare the waveform peak with the exact frame where the hands meet when checking sync manually.
- Say the Take Number Out Loud: Recording the take number on both devices makes it easier to pair the correct camera footage and microphone file later.
- Wait for a Quiet Moment: A clap recorded over loud traffic, music, or other noise can be harder to identify clearly in the waveform.
Repeat the cue whenever you begin a new take. That gives each recording pair a clear marker to find later.
Part 3. Pair the Correct Camera Take with the Correct Recording
Before you automatically sync audio and video, make sure the camera footage and external audio belong to the same take. A long shoot can produce dozens of similar-looking files, so use the checks below to identify the correct pair before starting synchronization:
| What to Check | How It Prevents a Mismatch |
| File Names | Renaming both files after each take is the fastest way to keep pairs together |
| Timestamps | Two files created within seconds of each other almost certainly belong together |
| Take Numbers | A spoken or written take number confirms the pairing without opening both files |
| A Short Preview | Playing a few seconds of each confirms the same words appear in both recordings |
Setting both device clocks before a shoot makes the timestamp check far more useful. It costs a minute and saves guesswork across a whole day of footage.
Part 4. Use Auto Synchronization in Filmora
With a confirmed pair, Filmora can automatically sync audio and video by comparing the sound both files share, and the process takes three steps.
Step 1. Place Both Files on the Timeline
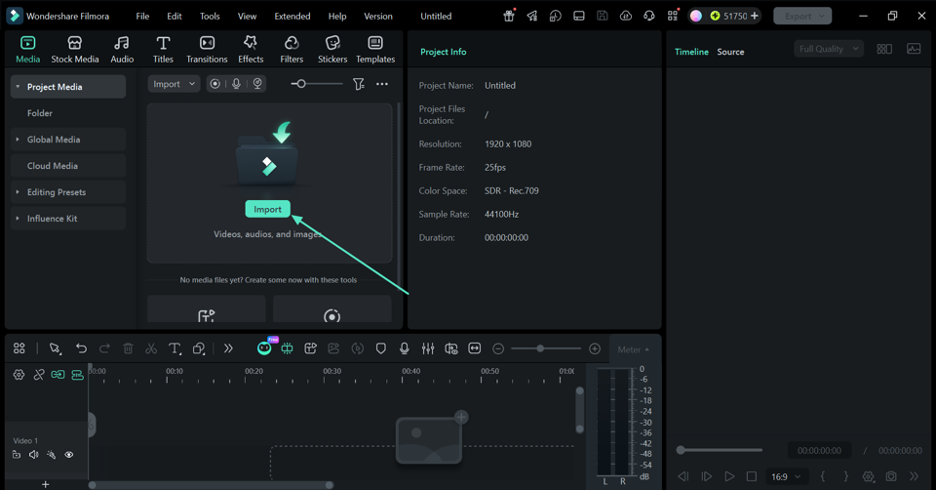
Create a project and “Import” the camera clip along with the microphone recording. Put the video on a video track and the external audio on an audio track below it.
Step 2. Select the Pair and Apply the Feature
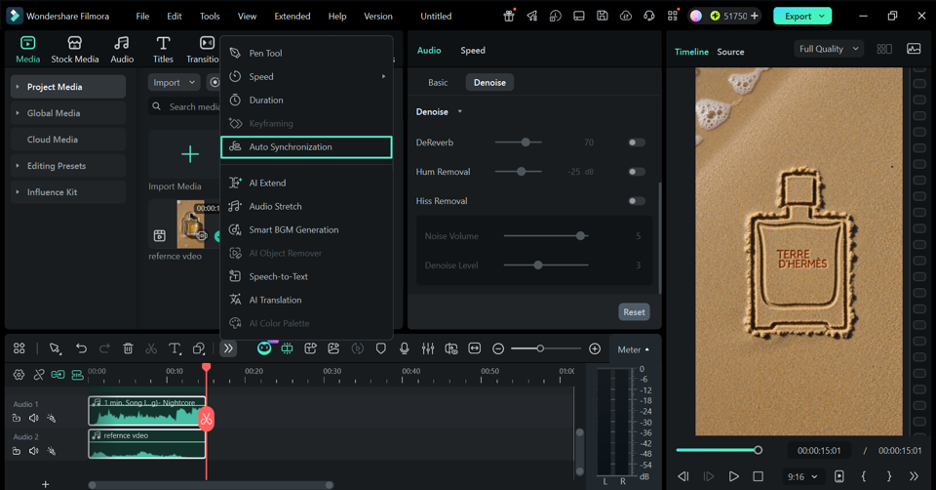
Select the two clips together, which makes the “Auto Synchronization” button appear on the toolbar. Right-clicking either selected clip offers the same option. A message shows that synchronization is in progress while the analysis runs.
Step 3. Inspect the New Alignment
Filmora moves the audio clip into position when it finishes. Play the section back before doing anything else, because the tool has made a decision and you have not yet checked it.
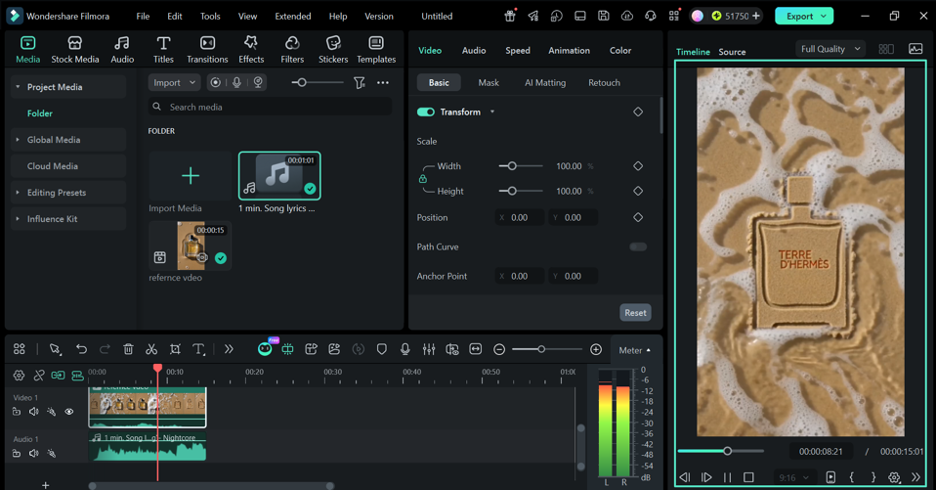
Note: This works on one video clip and one audio clip at a time. Selecting more than two clips disables the button, so pairs are handled one at a time.
Once the audio is aligned, you can continue editing the opening sequence. If it includes a title or text hook, the Filmora Text Animation guide explains how to animate that text.
Part 5. Replace the Camera Sound with the External Recording
Once the audio synchronization software has aligned both recordings and you have confirmed the timing, the camera audio has done its job. Keep it temporarily as a reference before removing it from the final mix.
Keep the Camera Track Until You Are Sure
Removing it early is the most common way people break their own sync, because any later adjustment then has no reference to work against. Leave it in place through the checks in the next section.
Mute It and Set the Microphone Level
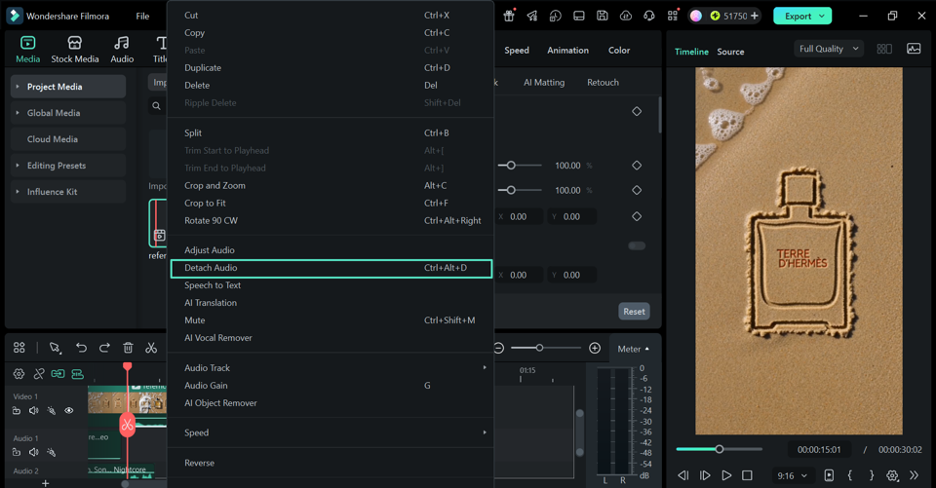
Select the video clip, then use “Detach Audio” to separate its camera sound. The “Ctrl + Alt + D” shortcut does the same thing. Mute that track with its speaker icon rather than deleting it. Then raise or lower the microphone recording until the dialogue sits at a comfortable listening level.
Part 6. Check for Echo, Offset, and End-of-Clip Drift
When you synchronize sound with video, checking the result at several points in the recording helps catch alignment problems before you continue editing. The 3 common issues below sound noticeably different, making them easier to identify and correct:
| What You Hear | What Has Gone Wrong |
| A Hollow Echo on Every Word | Both tracks are playing at once, so the camera audio still needs muting |
| Sound Arriving Before or After the Picture | A fixed offset, which shifting the audio clip corrects across the whole take |
| Alignment That Slips As It Plays | Gradual drift, where the two devices recorded at slightly different rates |
| Words That Never Match Anywhere | The two files are probably from different takes rather than out of sync |
Gradual drift can remain hidden during the opening minutes. Sync may look accurate initially but shift noticeably later. Always check both ends of every longer recording carefully.
Part 7. Build a Repeatable Recording Checklist
A few checks before recording can make it easier to match audio to video later. Keep these points in mind for each shoot:
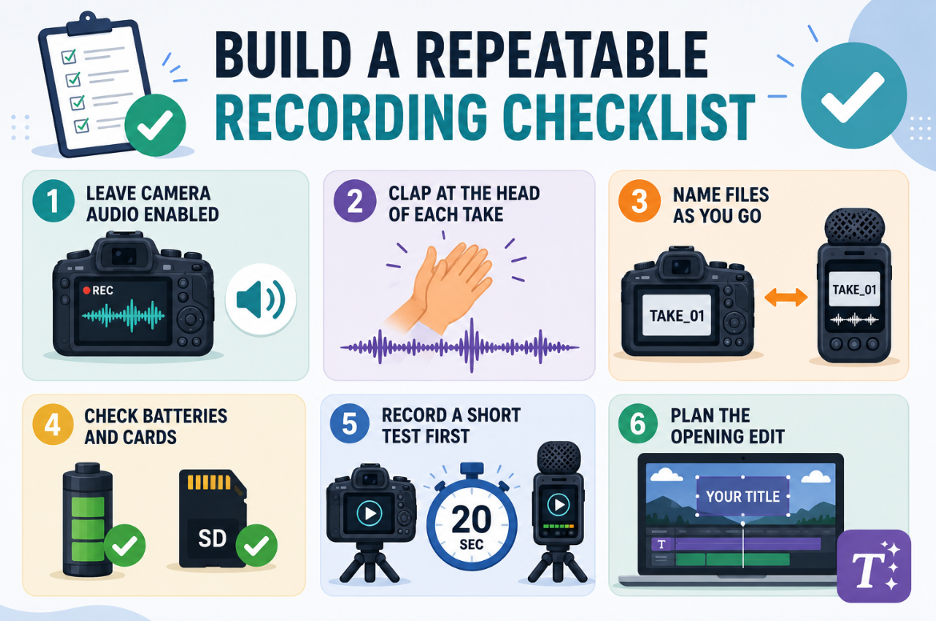
- Leave Camera Audio Enabled: Confirm the camera is still recording sound, even though that track will be muted later.
- Clap at the Head of Each Take: Make it a habit rather than something you remember on difficult days.
- Name Files as You Go: Matching names on both devices removes the guesswork before editing begins.
- Check Batteries and Cards: A recorder that stops mid-take leaves a gap no software can repair.
- Record a Short Test First: 20 seconds played back on both devices confirms everything is running before the real take.
- Plan the Opening Edit: If the video starts with a title or text hook, Filmora Text Animation can add motion to the opening text.
Conclusion
Matching external microphone audio depends heavily on how well you prepare each recording. Good audio synchronization software works best when both files contain a clear reference track, shared cue, and correct pairing. Build those habits into every shoot to make alignment faster and more reliable. For a simpler editing workflow, Filmora can automatically align matching audio and video tracks while keeping the remaining editing tools in one place.