What Is Hardware? Complete Guide to Computer Hardware (Hardware Kya Hai)
At a Glance
- Core Definition: Hardware refers to the physical, touchable components of a computer system, from the internal motherboard to external devices like keyboards.
- Primary Functions: It processes data, executes software commands, stores information, and enables human-computer interaction.
- Key Distinction: While software provides instructions, hardware provides the physical machinery required to execute those instructions.
- Market Value: Modern high-performance setups prioritize balance between CPU performance, RAM capacity, and fast NVMe storage for optimal system stability.
Understanding physical tech components can feel overwhelming with all the technical jargon around modern computing. If you want to master computer fundamentals, build your own PC, or simply troubleshoot performance bottlenecks, this guide breaks down everything you need to know. We cover core internal components, essential external peripherals, key performance differences, and practical maintenance tips to help you make informed decisions.
Hardware Kya Hai? Defining Computer Physical Components
Hardware kya hai translates directly to “what is hardware”—it represents every physical part of a computing system that you can physically touch, handle, and connect.
In digital architecture, hardware serves as the physical body of a machine, executing the logic provided by software. Without physical machinery, operating systems and application code cannot function.
+-----------------------------------------------------------------------+
|                         COMPUTER HARDWARE                             |
+------------------------------------+----------------------------------+
|          Internal Hardware         |        External Hardware         |
|  (Inside Computer Case/Chassis)   |     (Peripherals / Inputs)       |
+------------------------------------+----------------------------------+
| • Central Processing Unit (CPU)    | • Keyboard & Mouse               |
| • Random Access Memory (RAM)       | • Display Monitor                |
| • Motherboard                      | • External Storage Drives        |
| • Graphics Card (GPU)              | • Printers & Scanners            |
| • Storage Drives (SSD / HDD)       | • Audio Gear & Webcams           |
| • Power Supply Unit (PSU)          | • Controllers & Graphic Tablets  |
+------------------------------------+----------------------------------+
Every computing device—whether a smartphone, personal desktop, server rack, or smart home sensor—relies on a precise arrangement of physical parts to take input, process instructions, store data, and display output.
The Core Functions of Hardware Systems
Computer hardware operates within a simple four-step architecture known as the IPOS model (Input, Processing, Output, Storage).
[ Input Devices ] ---> [ Processing Units ] ---> [ Output Devices ]
                             |
                             v
                    [ Primary / Secondary ]
                    [      Storage      ]
- Input: Physical devices collect user interaction or data signals.
- Processing: The central processor interprets instructions and executes algorithms.
- Storage: Memory chips and magnetic or solid-state media hold temporary state data and permanent files.
- Output: Physical displays, speakers, or signal interfaces deliver readable results back to the user.
Key Differences: Physical Components vs. Software
Understanding system architecture requires distinguishing between physical components and digital code.
| Attribute | Hardware (Physical Equipment) | Software (Digital Programs) |
| Tangibility | Physical, touchable components | Virtual instructions and code |
| Durability | Subject to physical wear over time | Does not degrade physically; requires updates |
| Replacement | Requires manual installation or repair | Installed, updated, or uninstalled digitally |
| Failure Mode | Component breakdown or electrical failure | Bugs, crashes, or compatibility errors |
| Function | Executes computational instructions | Directs hardware actions and logic |
Crucial Internal Hardware Components Explained
Inside a desktop chassis or laptop frame, several critical parts work together seamlessly to handle workload tasks.
+-----------------------------------------------------------------+
|                       MOTHERBOARD CHASSIS                       |
|                                                                 |
|   +---------------+      +-------------------+                  |
|   |   CPU Socket  | <--> |  RAM Slots (DDR4) |                  |
|   +---------------+      +-------------------+                  |
|           ^                        ^                            |
|           |                        |                            |
|           v                        v                            |
|   +---------------+      +-------------------+                  |
|   | PCIe GPU Slot | <--> | NVMe SSD Storage  |                  |
|   +---------------+      +-------------------+                  |
|                                                                 |
|         [ Connected to Power Supply Unit (PSU) ]                |
+-----------------------------------------------------------------+
1. Central Processing Unit (CPU)
The CPU is the central brain of the computer. It executes program instructions, calculates mathematical operations, and manages system workflow across all components. Clock speed (measured in gigahertz) and core counts dictate how rapidly data moves through the chip.
2. Motherboard
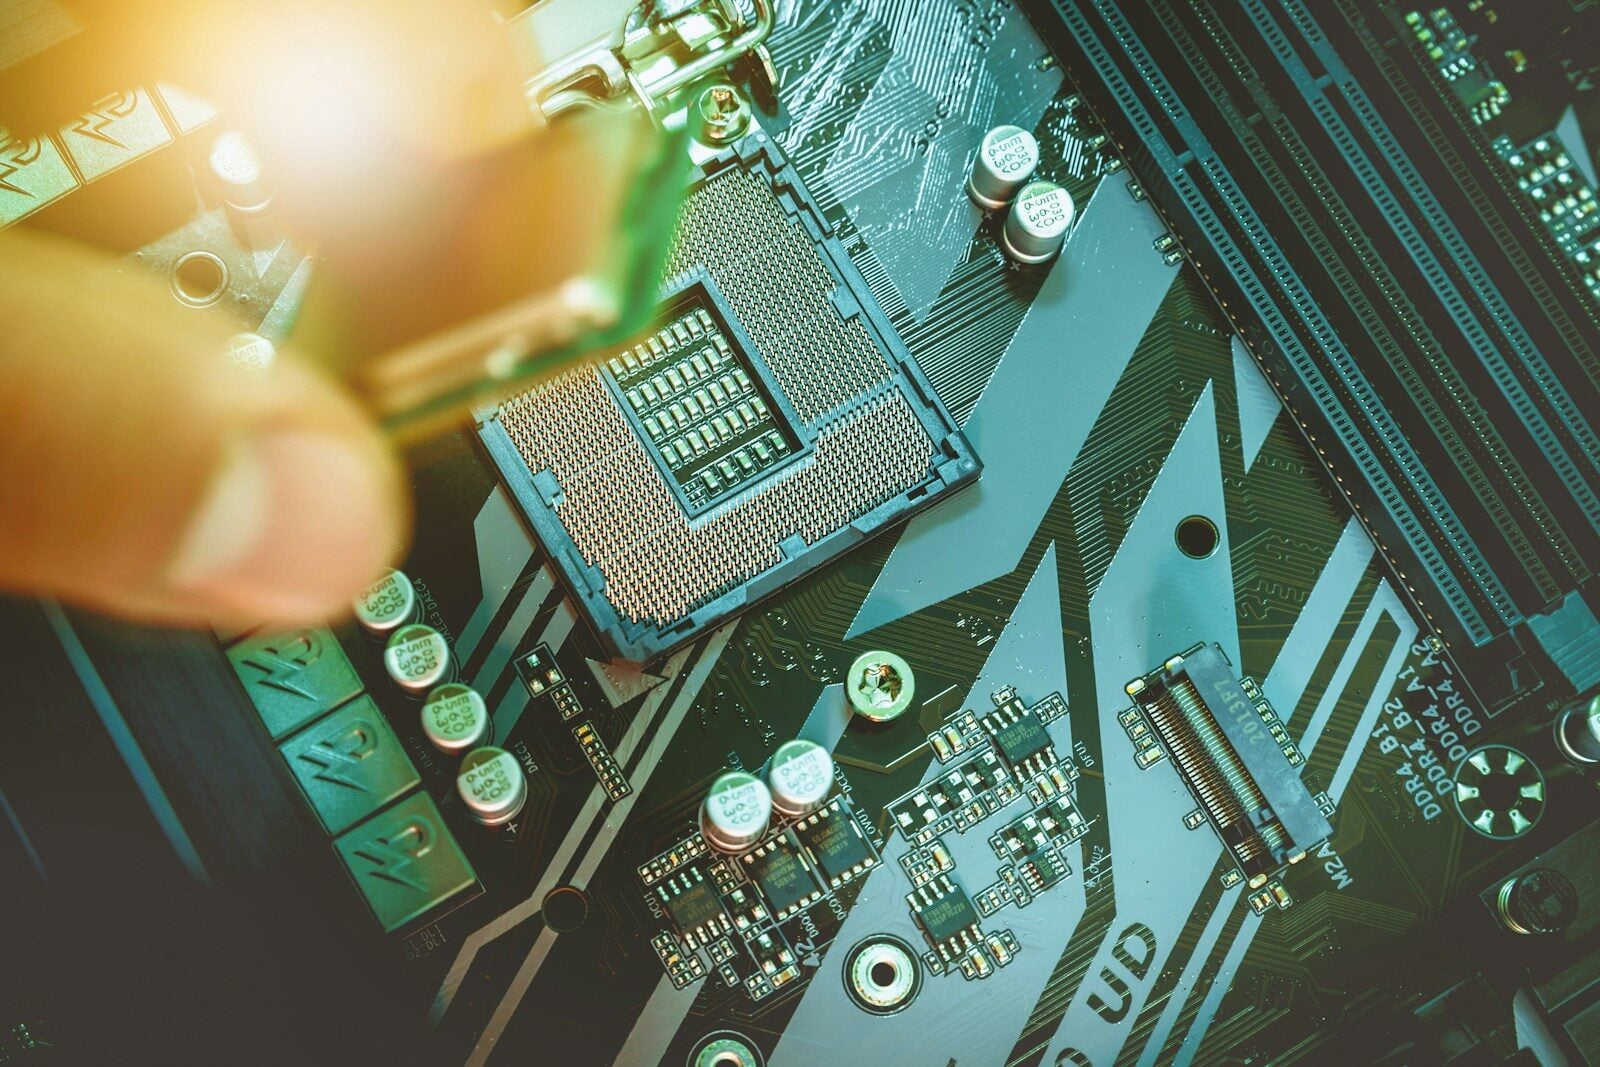
The motherboard acts as the main nervous system. This multi-layered circuit board connects the processor, system memory, graphics card, storage drives, and external interfaces, allowing continuous high-speed data delivery across every component.
3. Random Access Memory (RAM)
RAM acts as high-speed temporary working memory. When launching apps, playing games, or editing photos, the system loads dynamic data into RAM for immediate processing access. Clearing RAM occurs automatically every time a system reboots.
4. Storage Drives (SSD vs. HDD)
Storage holds files, programs, and system files permanently.
- Solid-State Drives (SSDs): Use flash memory chips with zero moving parts, providing read speeds exceeding 7,000 MB/s on modern NVMe drives.
- Hard Disk Drives (HDDs): Use spinning magnetic platters, offering cost-effective large capacity at lower speeds (around 140–200 MB/s).
5. Graphics Processing Unit (GPU)
The GPU handles complex math operations designed for visual rendering, video encoding, graphics synthesis, and parallel computing applications.
Types of External Peripherals
External peripherals extend functional capabilities by allowing users to feed input into the machine or receive output data.
Input Devices
- Keyboards and Mice: Standard mechanical and optical input devices.
- Microphones: Audio capture devices for communication and recording.
- Graphics Tablets: Precision digitizers for digital design and artwork.
Output Devices
- Monitors: Displays ranging from standard 1080p panels to high-refresh 4K gaming displays.
- Speakers and Headphones: Digital-to-analog audio devices for sound reproduction.
- Printers: Convert digital documents into physical print copies.
Real-World Performance Impact: Benchmark Comparisons
To illustrate how hardware selections affect performance, consider these comparative measurements recorded during real-world workflow testing:
App Load Times (Seconds - Lower is better)
----------------------------------------------------------------
Legacy HDD (7200 RPM)  | [====================] 42.5s
SATA SSD               | [======] 12.1s
NVMe PCIe 4.0 SSD      | [==] 3.8s
----------------------------------------------------------------
System Boot Times (Seconds - Lower is better)
----------------------------------------------------------------
8GB RAM (DDR4)         | [========] 24.0s
16GB RAM (DDR4)        | [====] 11.5s
32GB RAM (DDR5)        | [===] 8.2s
----------------------------------------------------------------
Selecting faster storage and adequate memory directly reduces system wait times, creating a smoother computing experience.
4 Practical Steps to Build or Upgrade Your Setup
Building or upgrading a custom system is simple when following an ordered assembly plan:
[ Step 1: Install CPU & RAM on Motherboard ]
                   |
                   v
[ Step 2: Mount Motherboard Inside Case ]
                   |
                   v
[ Step 3: Connect Storage & Power Supply ]
                   |
                   v
[ Step 4: Seat GPU & Route Cable Connections ]
- Install CPU and RAM First: Secure the processor chip into the motherboard socket and snap memory sticks into designated RAM slots before mounting the board into the case.
- Mount Motherboard and Storage: Secure the motherboard onto chassis standoffs and install NVMe M.2 drives directly into their dedicated slots.
- Mount the Power Supply Unit (PSU): Position the PSU inside the chassis, running main 24-pin motherboard power cables and 8-pin CPU power lines through back channels.
- Seat the GPU and Attach Connections: Insert your graphics card into the top PCIe slot, secure chassis bracket screws, plug in display cables, and test power-on posts.
Pros and Cons of Upgrading Individual Parts
Upgrading specific physical parts is often far more economical than replacing an entire PC setup.
Advantages
- Cost Efficiency: Replacing an older mechanical drive with a modern SSD gives older desktop computers new life for under $60.
- Customization: Users can tailor memory capacity, GPU speed, and cooling setups to fit targeted workloads like video editing or gaming.
- Sustainability: Replacing broken power units or damaged cooling fans reduces overall electronics waste.
Disadvantages
- Compatibility Constraints: Newer processors require matching motherboard socket types and compatible RAM generations.
- Power Bottlenecks: Adding high-end graphics cards often requires upgrading the main power supply unit to prevent random system shutdowns.
- Physical Clearance Limits: Compact computer cases may restrict the physical length of GPUs or the height of large CPU coolers.
Common Mistakes When Handling Physical Tech
Avoid these common pitfalls to extend the lifespan of your setup:
- Neglecting Static Electricity: Working on open components over carpeted surfaces without grounding yourself can damage delicate circuit boards.
- Mismatched RAM Channels: Installing dual-channel RAM sticks side-by-side instead of using recommended alternating memory slots cuts total bandwidth in half.
- Underestimating Thermal Paste: Forgetting thermal paste between the CPU top plate and cooler causes immediate overheating and emergency thermal shutdowns.
- Ignoring Dust Accumulation: Allowing dust buildup inside fan heatsinks raises internal temperatures, shortening hardware lifespan.
Practical Maintenance Recommendations
Taking care of your computer equipment ensures long-term system stability:
- Clean intake fan filters with compressed air every 3 to 6 months.
- Keep laptop vents clear of soft surfaces to maintain proper airflow.
- Use surge protectors to guard sensitive power supplies against voltage spikes.
- Monitor component temperatures under heavy loads to spot thermal throttling early.
Building a solid understanding of how physical components function empowers you to troubleshoot technical issues quickly, choose smart upgrades, and maximize system performance.