Lost Files? A Complete Step-by-Step Guide to Recovering Deleted Data from a Windows PC
Whether it’s a school project, a contract with a customer or a collection of family images accumulated over years, you lose a crucial file, and it’s a little disaster. The good news is that deletion rarely means gone permanently. When you delete a file, Windows usually just marks that space as available, not erased.
This guide will show you exactly how to recover deleted files on a Windows PC, from the simplest fixes to more advanced techniques. Perhaps you are asking how to restore deleted files from the Recycle Bin. Or you may require a professional Windows file recovery program after a permanent delete. We’ll talk about three established ways, tell you when each one is preferable, and teach you how to prevent blunders that make recover deleted files situations worse.
Critical First Steps to Maximize Recovery Success
Before doing anything else, follow this golden rule:
Stop using the drive where the files were deleted.
Every new file you save, every software you install, every temporary file your system creates can destroy the deleted data. If data is overwritten, it’s usually gone; so speed and caution matter more than anything else right now.
Here’s what you should do immediately:
- Do not save anything new to the drive you deleted the files from, such as downloads or documents.
- Stop installing new software on that drive. The installers write hundreds of small files on it.
- You may download recovery software to another drive, such as a USB flash drive or a second hard disk.
- Avoid running disk cleanup, defrag or system updates until you’ve completed the recovery process.
If you follow the steps below, you will have the best chance possible of getting your files back unharmed and intact.
It also helps to think about how the file was lost in the first place, since the cause often points to the right fix. A simple delete usually means it’s still in the recycle bin. A Shift + Delete, a formatted drive, or a corrupted partition usually means you’ll need dedicated recovery software instead. If you know which category you belong to, you can save yourself time and avoid methods that won’t work for you.
Method 1: Recover from the Recycle Bin
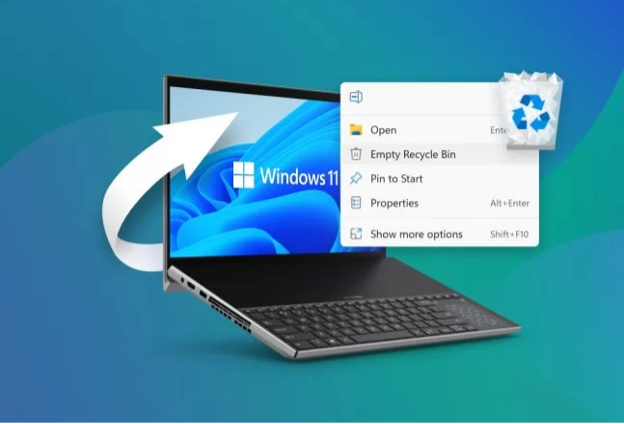
The Recycle Bin is your first stop, and often the fastest way to fix the problem. This is where Windows stores deleted files temporarily, unless you have already emptied the bin or used Shift + Delete. If you deleted your file recently through a normal delete, chances are it is still out there waiting for you.
How to restore files from the Recycle Bin:
- Double-click the Recycle Bin icon on your desktop to open it.
- You can browse or search for the file you want to recover in the window search bar.
- Right-click the file and select “Restore” from the context menu.
- Check the original folder location of the file to confirm it was returned successfully.
This method works because no extra software is required, and it takes a minute or two. For most casual users, it’s often the first answer to “how do I recover deleted files?” But if the Recycle Bin has been emptied or the file has bypassed it, it won’t do any good.
Method 2: Use Windows File History or Previous Versions
If your file isn’t in the Recycle Bin, Windows might have a backup copy available through File History or Previous Versions. If you had File History enabled before the file was deleted, this feature works, so it’s worth a look even if you’re not sure.
- Find the folder where the deleted file was located, then right-click any blank space in it.
- Choose “Properties” and then click on the “Previous Versions” tab at the top of the window.
- Choose a version before the deletion date, then click Restore to restore the folder.
- If File History was never enabled, this method will not show any versions to restore.
This method is particularly useful for recovering entire folders, not just single files, as it restores a snapshot in time. It’s less useful for one-off deletions on drives that never had backup features enabled.
Before File History can start protecting your files, you need to turn it on in Windows Settings manually. If you’ve never set it up, this method simply won’t have anything to offer, and that’s completely normal. If this is the case, then jump to a dedicated recovery tool instead of wasting any more time here.
Method 3: Use 4DDiG Data Recovery Software
If you don’t have a backup and the Recycle Bin is empty, you should use special recovery software. This is also the way to go for how to recover deleted files from Recycle Bin after emptying it or for data that has been permanently deleted. For these more challenging recovery situations, 4DDiG Data Recovery is a trusted Windows file recovery tool.
Why use 4DDiG?
4DDiG scans your drive deeply to find fragments of files that are no longer visible or listed by Windows. It can recover data from internal hard drives, external drives, USB flash drives, SD cards and even from formatted or corrupt partitions. The software operates in read-only mode while scanning. It will never write new data to your original drive. It also has preview capabilities, so you can see whether a file is intact before you spend any time or money recovering it. If you have damaged photo or video files when they come back, 4DDiG has built-in AI-powered repair tools right in the program.
Another benefit is that it supports a wide range of file types and situations in a single tool. Lost a document? Deleted an email? Can’t find a video? Usually the same software will help. This is a convenient choice for anyone who doesn’t want to juggle a bunch of recovery tools for different situations.
Step-by-Step Guide to Recover Deleted Files with 4DDiG
Step 1: Download & Install 4DDiG
Head over to the 4DDiG Windows Data Recovery page and grab the installer, but be sure to save it to a different drive than the one you’re recovering. Setup takes just a couple of minutes, and the prompts are straightforward enough to follow without any guesswork. Once installed, open the program to begin.
Step 2: Select the Location
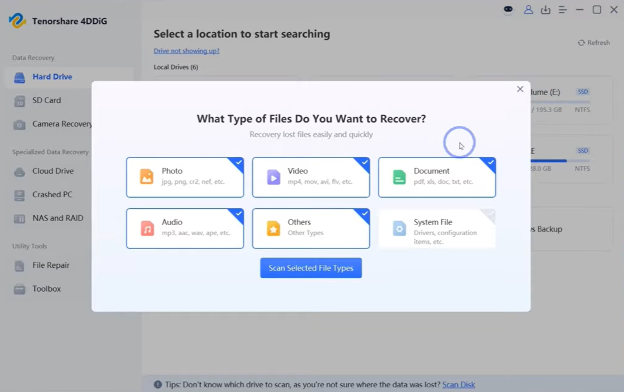
Then tell 4DDiG the drive, partition or folder where the missing files used to be. Not quite sure where they were? The safest way is to scan the entire drive; it will not do any harm. The main screen will show all connected drives, including external ones.
Step 3: Scan for Lost Files
Click on “Scan” and let the software search that location for anything it can recover. A quick scan takes only a few minutes to find recently deleted files, but a deep scan is much more thorough and takes significantly longer. If you are looking for permanently deleted or lost files, the deep scan is what you need.
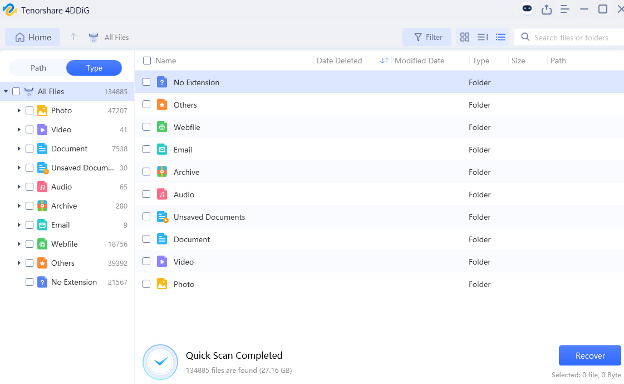
Step 4: Preview and Recover
Once the scan is complete, spend a few minutes reviewing the results by category and previewing anything that looks interesting. Found what you were looking for? Select it, hit Recover, and then select a different drive to save to. Now this last point is important. If you save back to the original drive, you will overwrite anything else that is waiting to be recovered.
Free Trial and Pricing
There is a free version of 4DDiG so you can try the software before you buy it. Windows users get up to 2GB of recovery space for free, and Mac users get 500 MB for free. That means you can scan, preview and verify your files are recoverable before deciding whether to upgrade. Test the free data recovery trial and judge the results yourself.
Tips for Specific Scenarios
How to recover deleted files from the Recycle Bin after emptying
When you empty the Recycle Bin, the files are no longer visible using normal Windows tools. At this point, your best bet is to use dedicated recovery software such as 4DDiG, which can scan for underlying data fragments. Be quick about it and don’t save any new files to that drive until the scan is finished.
How to recover permanently deleted files (Shift + Delete)
With Shift + Delete, the files are deleted immediately, bypassing the Recycle Bin altogether. In practice, the data will usually remain on the drive until it is overwritten by something else. Often a deep scan with recovery software can find and successfully restore these files.
How to recover deleted files on Windows 10/11
The process is pretty much the same on both operating systems, since Windows 11 shares many of its file system features with Windows 10. First, look in the Recycle Bin, then Previous Versions if necessary, and finally dedicated software as a last resort. This layered approach applies whether you’re troubleshooting how to recover deleted files on Windows 10 or the newer Windows 11 interface.
How to Recover Files From an External Drive
External drives (USB flash drives, portable hard drives, etc.) follow the same basic recovery logic as internal drives. Connect the drive to your PC, do not write any new data to it, and then run a scan with recovery software like 4DDiG. External drives are often easier to recover from since they tend to have less overall write activity. The same process works if you need to recover files deleted from a USB stick, an SD card or a portable hard drive.
Common Mistakes to Avoid During Recovery
Even with the right tools, there are a handful of common mistakes that can turn a recoverable situation into one of permanent loss. Avoiding these mistakes is just as important as choosing the right recovery method in the first place.
- Saving recovered files to the same drive. This can overwrite other files you haven’t yet recovered, so always use a different drive or folder.
- You wait too long to start recovery. The longer you use the affected drive, the more likely it is that your files will be overwritten permanently.
- First, run disk cleanup or optimization tools. These utilities can destroy the very data segments that recovery tools need to find.
- Assuming a formatted drive is irreparable. Formatting rarely destroys data immediately, so it is often worth trying a deep scan.
With these in mind, you can make the most of whichever recovery method you choose, including 4DDiG.
FAQ
Q1: Can I recover deleted files on Windows for free?
Yes. It is one of the most-asked questions among people searching for how to recover deleted files without paying anything upfront. Start with the Recycle Bin or Previous Versions. If those fail, you can use the free version of 4DDiG to scan, preview and recover your files up to 2GB.
Q2: Is it possible to recover permanently deleted files?
Yes. Files marked as “permanently deleted” are still physically present on the drive until overwritten by new data. To achieve the best results, use recovery software like 4DDiG as soon as possible.
Q3: Why don’t my recovered files open?
Recovered files that do not open are often partially overwritten by other data written after deletion. The sooner you act after deletion, the better your chances for a full working recovery. 4DDiG provides AI-powered file repair functionality to recover corrupted photos and videos.
Q4: Can I recover files from a formatted drive?
Yes. Formatting a drive marks the space as available, but the underlying data is not immediately erased. Utilize the deep scan feature of 4DDiG to search for recoverable files on the formatted drive.
Q5: How long does data recovery take?
Recovery time depends largely on the size and condition of the drive being scanned. For most typical recoveries, 4DDiG takes about five to ten minutes, but deep scans on large drives might take much longer.
Q6: Is 4DDiG safe to use?
Yes. 4DDiG is read-only. It never writes to or does anything on your original drive during scanning or recovery.
Final Thoughts
Deleting a file seems permanent, but in most cases the underlying data lives far longer than people expect—easy: Start with the Recycle Bin. If you have a backup on your system, try Previous Versions. When these options fail or the deletion is permanent, dedicated software like 4DDiG provides a safe way to recover your lost data. The most important rule in this process is speed. Stop using the affected drive immediately, and act before new data overwrites what you are trying to save.